


If you’re looking for a reliable and versatile solution to control various electrical devices remotely, the AM36-4R-WiFi Relay Board is an excellent choice. This comprehensive guide will take you through the process of setting up and using this device, from unboxing to advanced customization. Get ready to transform the way you manage your electronics with this user-friendly, Wi-Fi-enabled relay board.
Introduction to the AM-36-4R-WiFi Relay Board
The AM36-4R-WiFi Relay Board is a state-of-the-art device designed to simplify your life by providing remote control over electrical appliances. Whether you want to turn lights on and off, control heating or cooling systems, or automate your home or office, this relay board offers a plethora of possibilities. It’s easy to install, user-friendly, and highly customizable.
Understanding the Components
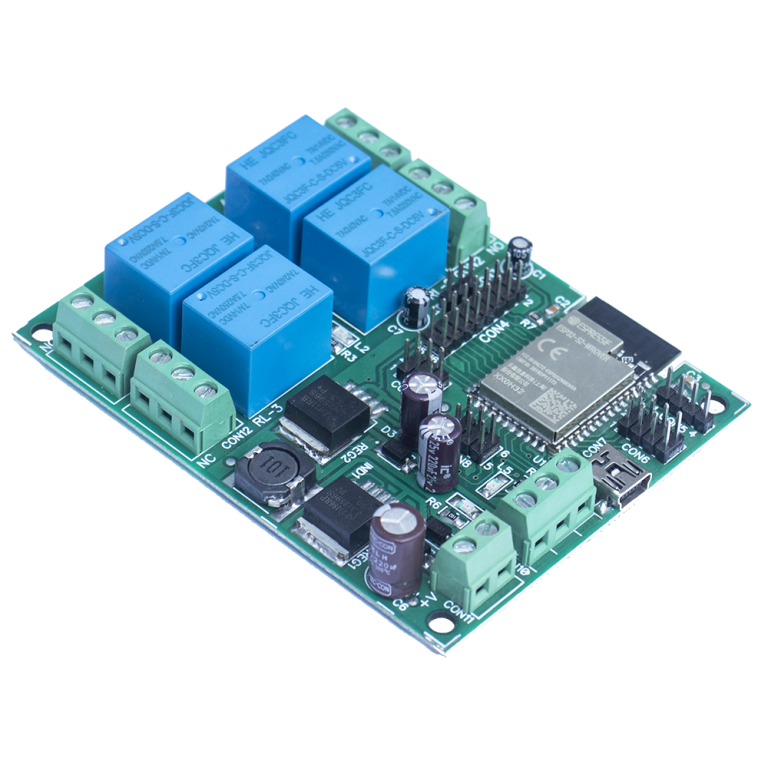
Before diving into the setup process, let’s get acquainted with the components that make up the AM36-4R-WiFi Relay Board. This knowledge will prove essential in the installation and configuration phases.
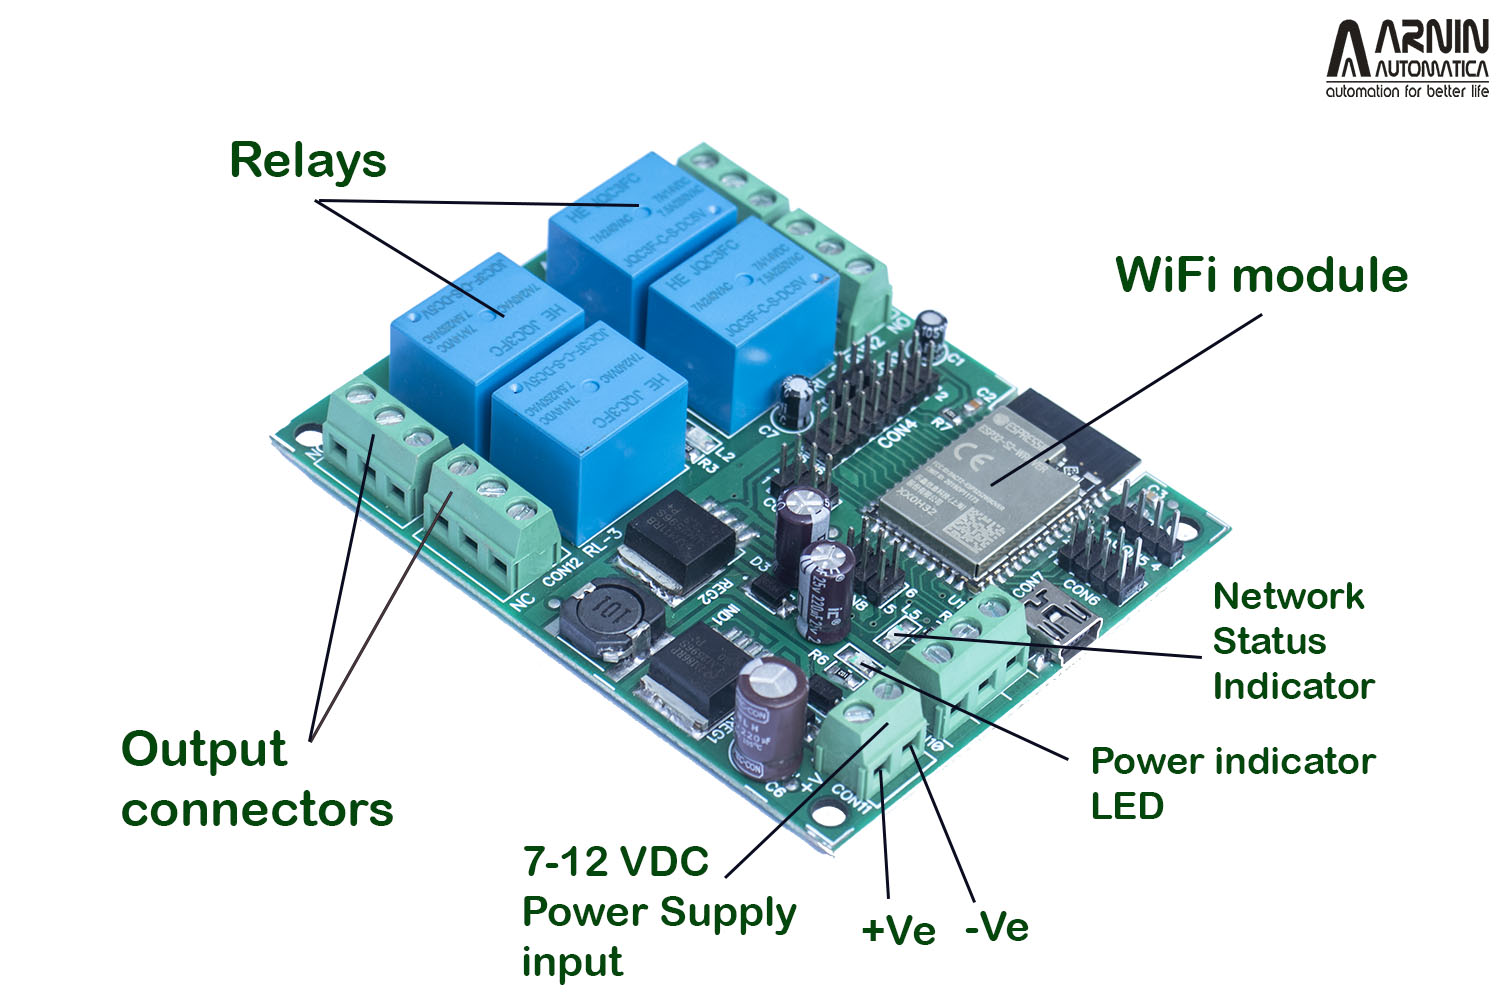
The board consists of:
- Relay switches
- Wi-Fi module
- Power supply input
- Status indicators
- Connectivity ports
Safety Precautions
Safety always comes first. In this section, we’ll cover some essential safety precautions to ensure a secure setup and operation of your relay board. This includes guidelines for handling electrical components and avoiding potential hazards.
Unboxing and Initial Setup –
With safety in mind, let’s unbox the AM36-4R-WiFi Relay Board. We’ll guide you through the initial setup, including assembling the hardware and making the necessary connections. Be sure to follow the step-by-step instructions carefully. Before setting up the board, please ensure you have following in hand:
- Digital Multimeter
- 12 V DC power supply with +Ve and -Ve wires connected
- Your smartphone or PC is connected to your WiFi router.
- Your network name and password.
Now let us start –
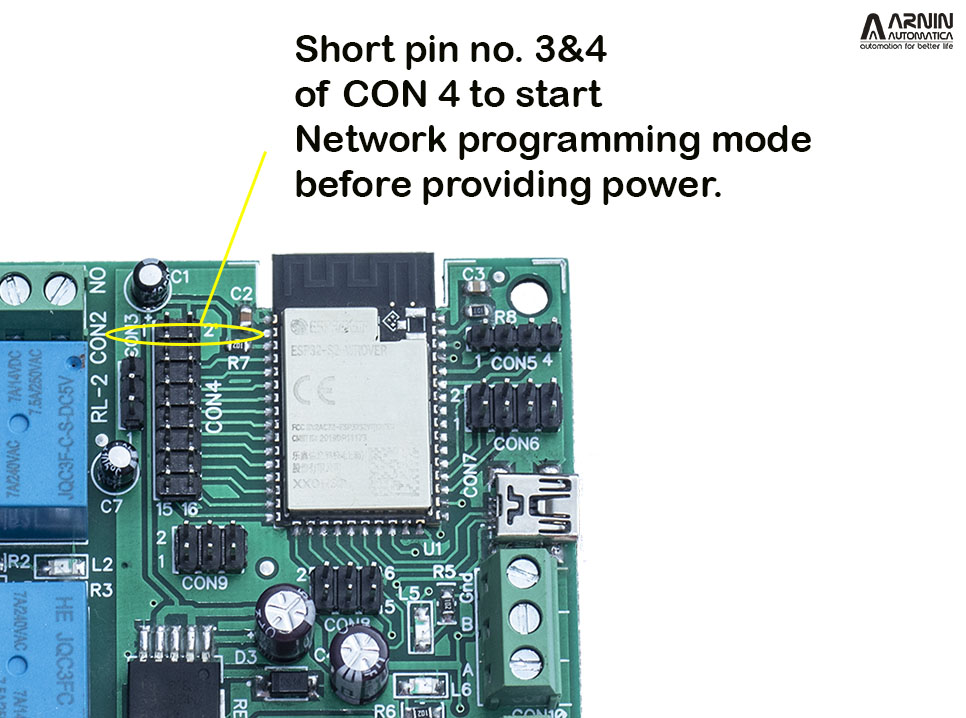
Step 1.
After having the board in hand, look for any damage to the board. If everything is okay, we will connect the power supply to the board. But as this is for the first time setting up your board, connect pin no. 3 & 4 of CON4 before applying power to the board as shown below –
Step 2.
Connect power supply to the board. Please be sure that +ve and -Ve connections are correct as shown in the picture shown before.
Step 3.
Once you apply power, the Power LED will be ON. And the Status indicator LED will start blinking fast to show that the board is now in programming mode. The board will start an Access Point – Arnin WiFi manager at 192.184.4.1 .
Step 4.
Open Network setting on your PC or Smartphone and look for Arnin WiFi manager and connect to the same network. There will not be any password to apply as it is an open network. The setting will be as shown below –
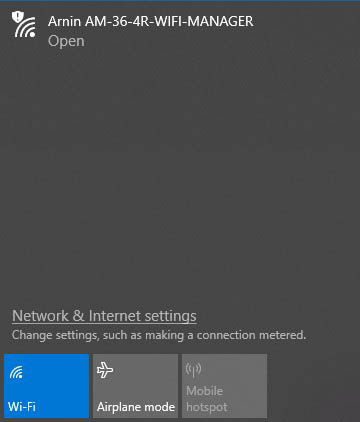
Connect to the Arnin AM-36-4R-WiFi Manager. And direct your web browser to 192.168.4.1 . It will connect to the board and open a setting webpage as follow –

Step 5.
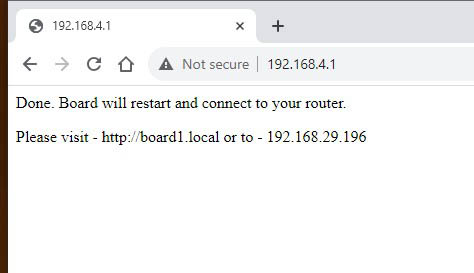
Enter your Network credentials that is your WiFi Network name and password name. In Board name you can input any name to identify the board like Board1, Board2 or Room1, Room2 etc. This is just to identify your board for future use. Once entered all the boxes, click the Submit button. The board will remember the settings and will try to connect your Wi-Fi network and once connected will provide you the network address provided by your router.
Please note down this address as this will be the address where you will get the controlling webpage – Dashboard of the board. Please note that you will be also able to visit the http://yourboardname.local to have dashboard of the board in case you do not want to use the web address provided by your router. The following pic shows the web address detail once the board is connected to your network after clicking the Submit button.
Step 6.
Dis connect the power supply. Remove the connection between Pin 3 & 4 of the connector CON4. Again connect the power.
This time the board will try to connect to your WiFi network and if it is successful, the Status indicator LED will be ON – will be lit permanently.
From now on, every time you apply power, the board will connect your router automatically. This will be indicated by status indicator LED permanently ON. In case it is not able to connect your network within 10 seconds, it will go to setting mode and it will be shown by flashing the status LED at a fast rate. If you have already programmed the board properly, just shut off the power and reapply after some time say one or two minutes. This happens if the network signal is weak.
Step 7.
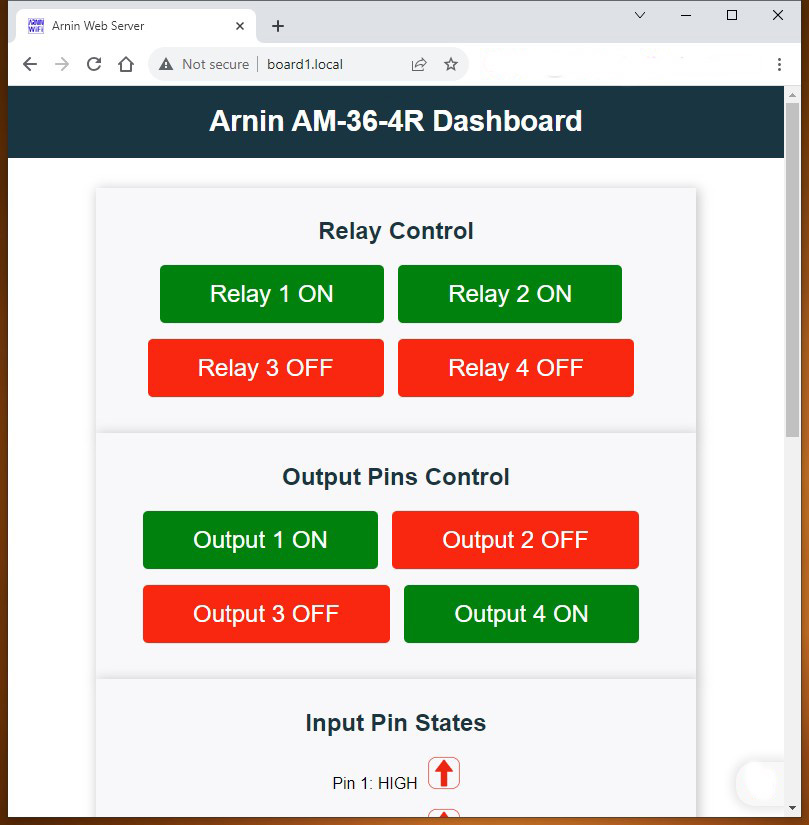
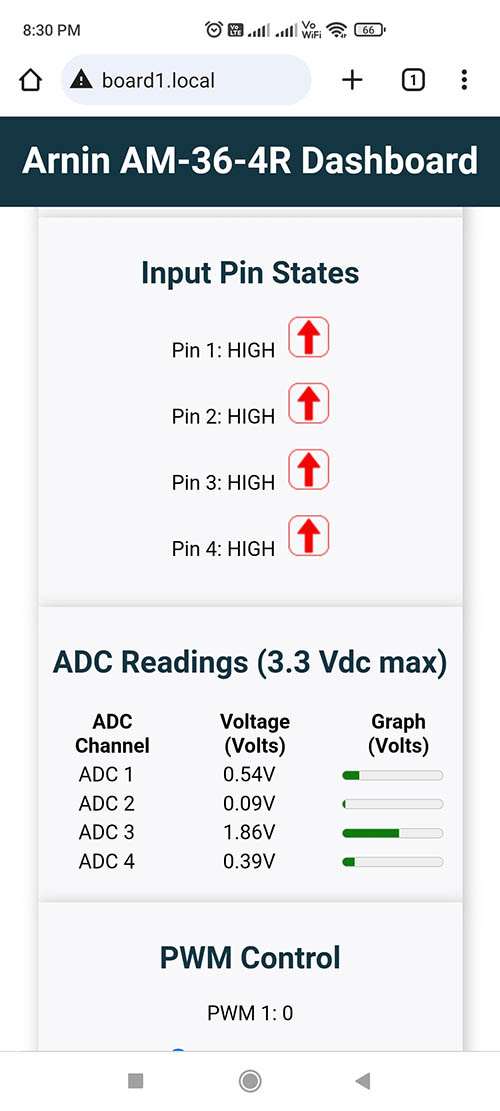
Now as the board is connected to your network, you can go to Dashboard to control the board from your PC or Smartphone. Set your network on PC or Smartphone to your router network. Point your web browser to the web address provided earlier while doing set up procedure. You can also go to dashboard by pointing the web browser to http://yourboardname.local . For example if the board name is Board1, than by pointing your web browser to http://board1.local will open dashboard as shown below –


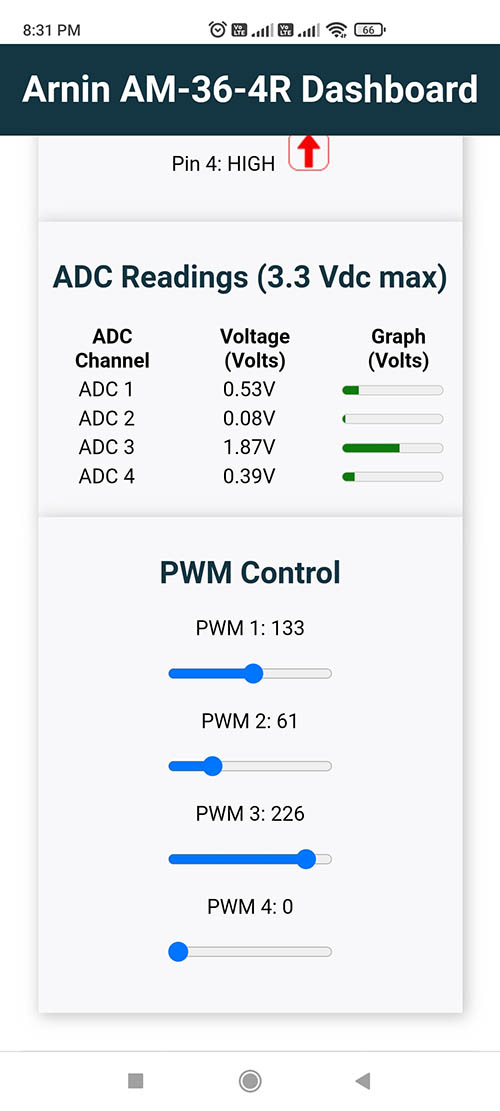
Once you have Dashboard you can control Relays, Output Pins, PWM pins and monitor ADC pins and Input pins through buttons and sliders as shown below –

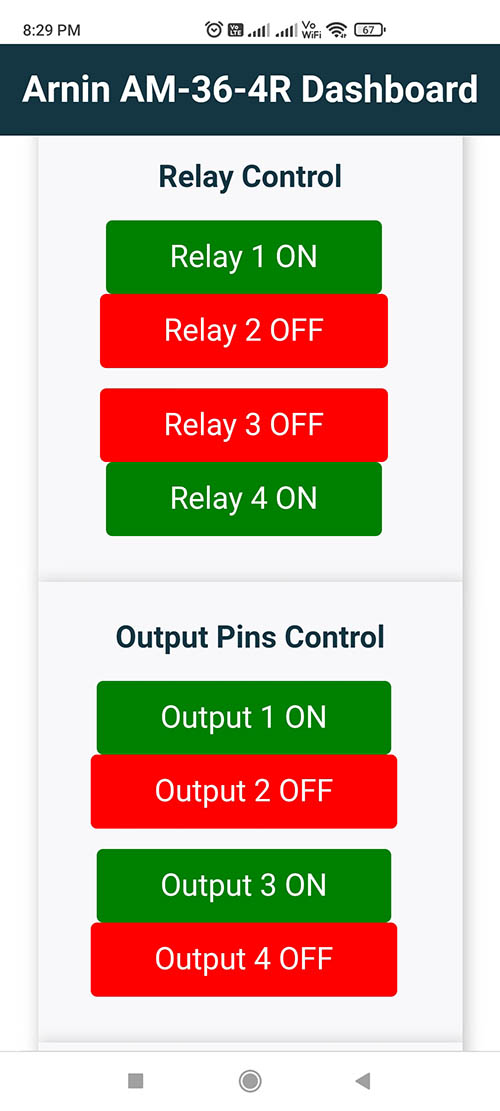
The Dashboard on smartphone will look like this –
We hope this guide help you to set up your 4 channel WiFi Relay board – AM-36-4R-WiFi.
If you have still not gone through the User Manual of AM-36-4R-WiFi, please download from our Download section and study the same to bring full potential of the board.
Troubleshooting Common Issues
No system is perfect, but with our troubleshooting guide, you can quickly address common issues that may arise during the setup or operation of the AM36-4R-WiFi Relay Board. If you come across any problems during set up, please refer to the User Manual or you can also contact our support team at support@arnin.in for further assistance.
In conclusion, the AM36-4R-WiFi Relay Board offers a versatile, user-friendly, and efficient solution for remote control of electrical devices. With the proper setup and configuration, you can transform your living or working space into a smart, connected environment.
FAQs
1. What devices can I control with the AM36-4R-WiFi Relay Board?
The board is compatible with a wide range of electrical appliances, including lights, fans, heaters, and more.
2. Is the setup process complicated?
Not at all. This guide walks you through each step, making it easy for users of all levels.
3. Can I control the board remotely from my smartphone?
Absolutely. The Wi-Fi capability allows you to control your devices using PC or your smartphone.
Don’t wait any longer; transform your space with the AM36-4R-WiFi Relay Board today! If you want to buy or gift this board to your friend or relative, you can do it from our online shop.


+ There are no comments
Add yours