


Ultrasonic sensor is very useful to detect the range of any object from its surface. Today we will have a look at ultrasonic sensor HC-SR-04, understand how it works and build a small project using it with Arduino.

We learn from nature and environment surrounding us. We know from early days that Bats use ultrasound – ultrasonic waves to locate their prey – a process called Echolocation.
As per Wikipedia
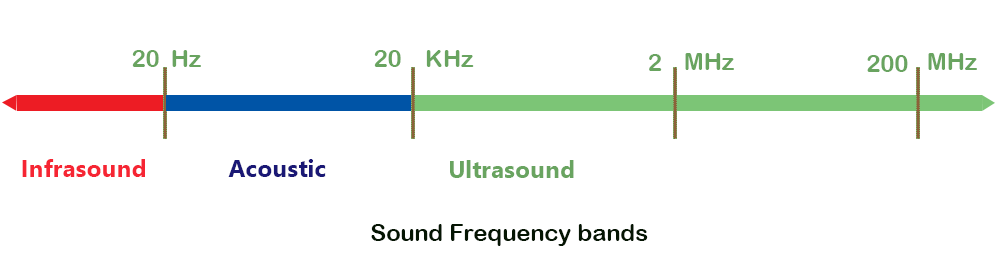
“Ultrasound is defined by the American National Standards Institute as “sound at frequencies greater than 20 kHz.” In air at atmospheric pressure ultrasonic waves have wavelengths of 1.9 cm or less.’
As per Wikipedia
” Bats can separate their calls and returning echoes by time. Bats that use this approach time their short calls to finish before echoes return. This is important because these bats contract their middle ear muscles when emitting a call, so they can avoid deafening themselves.
The time interval between the call and echo allows them to relax these muscles, so they can clearly hear the returning echo. The delay of the returning echoes provides the bat with the ability to estimate the range to their prey.”
We can use the same technique by using this ultrasonic sensor and find the distance of any object which is in front of the sensor.
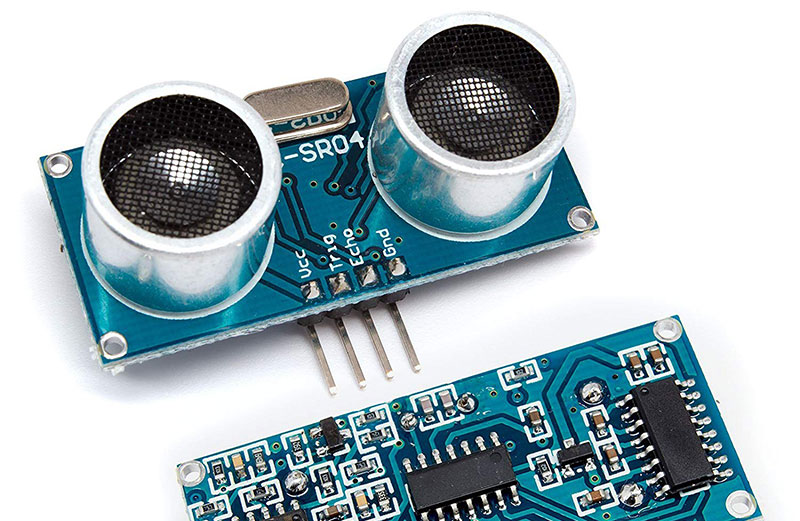
The ultrasonic sensor HC-SR04
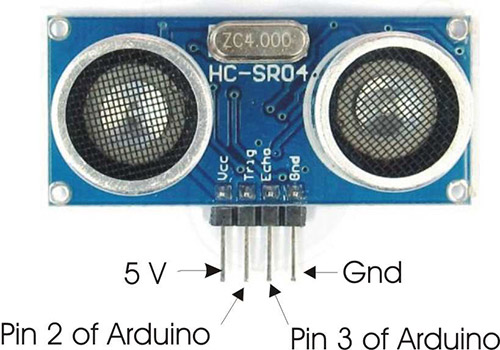
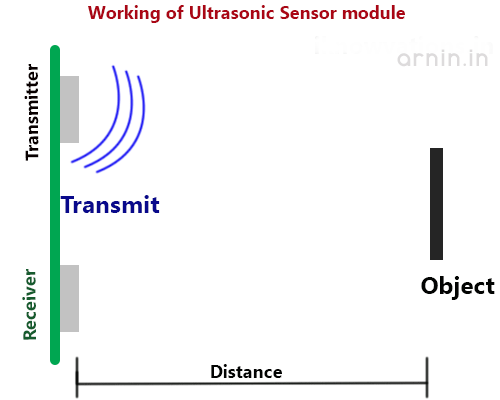
The above pic shows ultrasonic sensor module with 2 ultrasonic sensors, one of them is used as transmitter and the other as receiver.
The below animation shows how this sensor works.
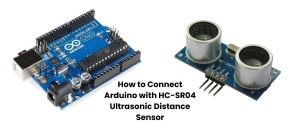
How to connect this ultrasonic sensor HC-SR-04 to Arduino.
As shown above there are 4 connecting pins of the sensor. One each is for power supply of 5 V and Ground. The other two are Trigger and Echo. Trigger pin is used to start a sound wave from transmitter and Echo pin is observed for the reflected wave. Once the sound wave is transmitted from the ultrasonic sensor, Echo pin is continuously monitored. The duration that the pin remains high depends upon the distance between the sensor and the object. Measuring the duration, the pin remains high will provide us the distance using the following formula.
distance = speed of sound * time taken /2
As per Wikipedia
” The speed of sound is the distance traveled per unit time by a sound wave as it propagates through an elastic medium. In dry air at 0 °C (32 °F), the speed of sound is 340.27 meters per second (1,116 ft/s; 1,225 km/h; 761 mph; 661 kn). At 20 °C (68 °F), the speed of sound is 343 meters per second (1,125 ft/s; 1,235 km/h; 767 mph; 667 kn), or a kilometer in 2.91 s or a mile in 4.69 s.”
For our calculation, we will consider the speed of sound at 340 meters per second. As we will be using this sensors for close range, we will convert it into 0.034 cm per micro second and use for calculating the distance for our project. The distance calculated has to be divided by 2 as the time taken is from sensor to the object and then the object to sensor, so it is a round trip for sound wave.
Also please bear in mind that the flat object which can reflect sound wave best will be easily detected while sharp & small objects or objects that deflect the sound waves in other direction than that of sensor, will not be able to be detected properly.

Connecting Arduino with ultrasonic sensor-
Connect the Arduino UNO and ultrasonic sensor as follows –
Arduino -> Sensor
5 V -> Vcc
Ground -> Ground
Pin 2 -> Trigger
Pin 3 -> Echo

Please note that you can connect any digital pin to Echo & Trigger pin of sensor provided you define them in arduino sketch.
The serial monitor output showing the distance in cms.

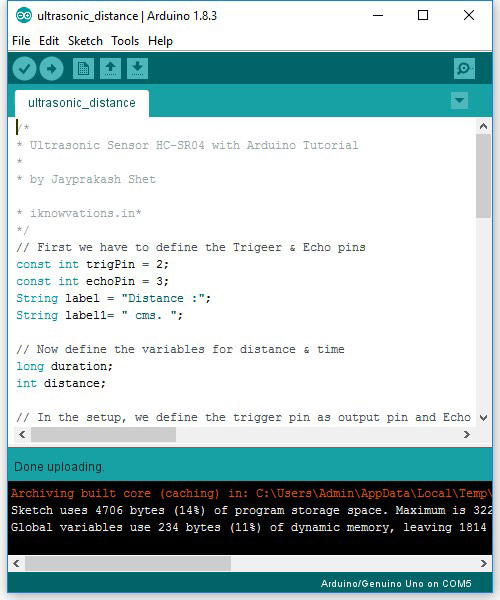
Following is the arduino sketch. Each step is explained. We are using pulseIn() command to measure the duration. The output will be shown every 500 ms.
/*
* Ultrasonic Sensor HC-SR04 with Arduino
*
* by Jayprakash Shet

* for more information please visit www.arnin.in
*/
// First we have to define the Triger  Echo pins
const int trigPin = 2;
const int echoPin = 3;
String label = "Distance :";
String label1= " Cms. ";
// define the variables for distance  time
long duration;
int distance;

// In the setup, we define the trigger pin as output pin and Echo pin, which has to be monitored for duration measurement. Also we start serial communication to monitor the distance calculated.

void setup() {
pinMode(trigPin, OUTPUT); // Sets the trigPin as an Output
pinMode(echoPin, INPUT); // Sets the echoPin as an Input
Serial.begin(9600); // Starts the serial communication
}

void loop() {

// First we have to clear the trigPin with some delay to stabilize the pin at low level
digitalWrite(trigPin, LOW);
delayMicroseconds(5);

// Now sets the trigPin on HIGH state for 10 micro seconds which will make //transuder to emit a burst

digitalWrite(trigPin, HIGH);
delayMicroseconds(10);
digitalWrite(trigPin, LOW);

// Read the echoPin, to get the duration in microseconds
duration = pulseIn(echoPin, HIGH);

// Now calculating the distance using the formula that will provide the distance in cm
distance= duration*0.034/2;

//Let us now print the distance on the Serial Monitor
Serial.println(label + distance + label1);

// put some delay

delay(500);
}
If you have any questions or want some help regarding the ultrasonic sensor or arduino, do writ to us in comment section below or you can also shoot a mail to support@arnin.in for any kind of help.


+ There are no comments
Add yours