Exploring the HC-SR04 Ultrasonic Distance Measuring Sensor: An In-Depth Guide
Introduction:
In the dynamic realm of electronic components, the HC-SR04 ultrasonic distance measuring sensor has become a versatile and widely embraced device in the realm of hobbyist electronics and DIY projects. This compact sensor employs ultrasonic waves to measure distances precisely, making it indispensable for applications such as robotics, home automation, and object detection. This article aims to provide a comprehensive overview of the HC-SR04 sensor, delving into its technical intricacies, features, and practical applications, especially in tandem with the popular Arduino platform.
Technical Insights:
The HC-SR04 operates on the principle of ultrasonic echo ranging, a technique commonly found in sonar systems. Comprising an ultrasonic transmitter and a receiver, its technical specifications are as follows:
Ultrasonic Transmitter:
The sensor’s transmitter emits ultrasonic waves at a frequency of approximately 40 kHz. These waves traverse through the air until they encounter an obstacle.
Ultrasonic Receiver:
Positioned alongside the transmitter, the receiver detects the reflected ultrasonic waves after bouncing off the obstacle. The time taken for the waves’ round trip is proportional to the distance between the sensor and the object.
Distance Calculation:
Utilizing the speed of sound in air (approximately 343 meters per second at room temperature), the sensor calculates the distance using the formula:
�=12×Speed of Sound×Time Taken
This time is measured in microseconds, with the 1/2 factor accounting for the round trip of the ultrasonic waves.
Range:
The HC-SR04 sensor typically boasts a range of 2 cm to 400 cm, making it suitable for a myriad of distance measurement applications.
Accuracy:
With an accuracy of around 3 mm, the HC-SR04 provides precise distance measurements, catering to applications where accuracy is paramount.
Features:
Compact Design:
The HC-SR04 sensor’s compact design facilitates easy integration into various projects, thanks to its small size.
Wide Range:
Its impressive range of 2 cm to 400 cm makes the sensor versatile for applications ranging from proximity sensing to measuring more substantial distances.
User-Friendly:
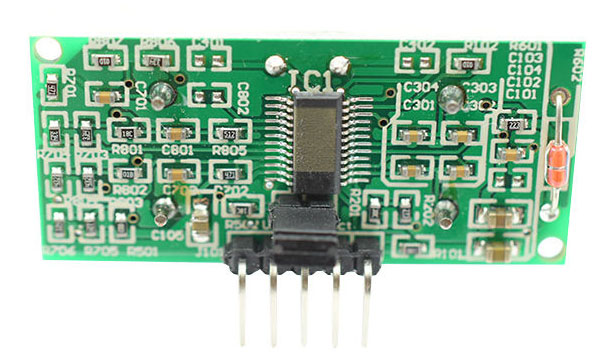
With only four pins (VCC, Trig, Echo, and GND), the HC-SR04 is straightforward to connect and interface with microcontrollers.
Low Power Consumption:
Energy efficiency sets this sensor apart, making it suitable for battery-powered applications where power consumption is a critical consideration.
Affordability:
HC-SR04 sensors are cost-effective, ensuring accessibility for hobbyists and makers on a budget.
Non-Contact Measurement:
As an ultrasonic sensor, the HC-SR04 enables non-contact distance measurements, eliminating the need for physical contact with the target object.
Connecting HC-SR04 with Arduino:
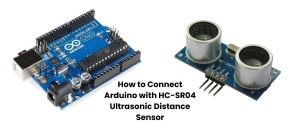
Let’s explore how to connect the HC-SR04 sensor with an Arduino to create a simple distance measurement system. Here’s a step-by-step guide:
Materials Needed:
- HC-SR04 Ultrasonic Sensor
- Arduino Board (e.g., Arduino Uno)
- Jumper Wires
- Breadboard
Wiring:
- Connect the VCC pin of the HC-SR04 to the 5V output on the Arduino.
- Connect the GND pin of the HC-SR04 to the GND on the Arduino.
- Connect the Trig pin of the HC-SR04 to any digital pin on the Arduino (e.g., D2).
- Connect the Echo pin of the HC-SR04 to another digital pin on the Arduino (e.g., D3).
Ensure secure connections and double-check the wiring to avoid potential issues.
Sample Arduino Sketch:
// Define the pins
const int trigPin = 2;
const int echoPin = 3;
// Variables to store the duration and distance
long duration;
int distance;
void setup() {
// Initialize Serial communication
Serial.begin(9600);
// Set trigPin as OUTPUT and echoPin as INPUT
pinMode(trigPin, OUTPUT);
pinMode(echoPin, INPUT);
}
void loop() {
// Trigger the sensor by sending a 10-microsecond pulse
digitalWrite(trigPin, LOW);
delayMicroseconds(2);
digitalWrite(trigPin, HIGH);
delayMicroseconds(10);
digitalWrite(trigPin, LOW);
// Measure the duration of the pulse received on the echoPin
duration = pulseIn(echoPin, HIGH);
// Calculate the distance in centimeters
distance = duration * 0.034 / 2;
// Display the distance on the Serial Monitor
Serial.print(“Distance: “);
Serial.print(distance);
Serial.println(” cm”);
// Wait for a short delay before the next measurement
delay(500);
}
Explanation of the Sketch:
- The trigPin triggers the sensor, and the echoPin receives the echo signal.
- In the setup() function, we initialize Serial communication for debugging and set the pinMode for trigPin as OUTPUT and echoPin as INPUT.
- The loop() function contains the main distance measurement logic.
- To trigger the sensor, a 10-microsecond pulse is sent using digitalWrite().
- The pulseIn() function measures the duration of the received pulse on the echoPin, proportional to the distance.
- Distance is calculated using the speed of sound, and the result is displayed on the Serial Monitor.
- A short delay is added before the next measurement to prevent rapid and unnecessary readings.
Testing the Setup:
Connect your Arduino to your computer, upload the sketch, and open the Arduino Serial Monitor (Tools -> Serial Monitor) to view distance measurements. Observe readings as you place objects at different distances in front of the HC-SR04 sensor.
This straightforward setup allows experimentation with the HC-SR04 sensor, unlocking possibilities for various Arduino-based projects, such as distance-triggered alarms or robotic obstacle avoidance systems.
Conclusion:
The HC-SR04 ultrasonic distance measuring sensor stands out as a reliable and affordable solution for distance measurement in various electronics projects. Its simplicity, coupled with accuracy and a broad range, makes it a favorite among hobbyists, students, and professionals. By interfacing the HC-SR04 with Arduino, a myriad of possibilities opens up for applications from robotics to smart home devices. In the ever-advancing landscape of technology, the HC-SR04 remains a fundamental building block for innovative projects in the realm of electronics.












+ There are no comments
Add yours